I wanted to show how you would use this tool to actually take changes made in the user interface and move them to your AOT.
1. Export user interface security changes from D365FO
- Go to System Administration -> Security Configuration -> Data tab -> Export
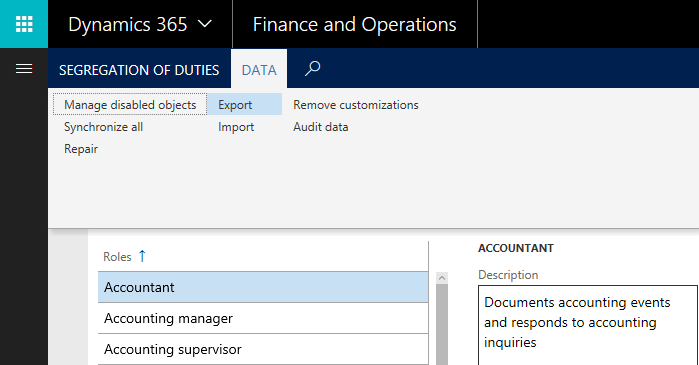
This will export an XML file with all security customizations that have been done in the user interface.
- When you launch it the input file will be the exported file from the user interface.
- The output location is the location where the output files will be saved.
- Click ‘Process’ button, this will parse the input XML and display the different security layers that have been customized in the user interface (and therefore exist in your security delta).
- You can then modify the Name, Label, and Description parameters of any security layer.
- When you are ready you can click the ‘Export’ button and the files will be exported.
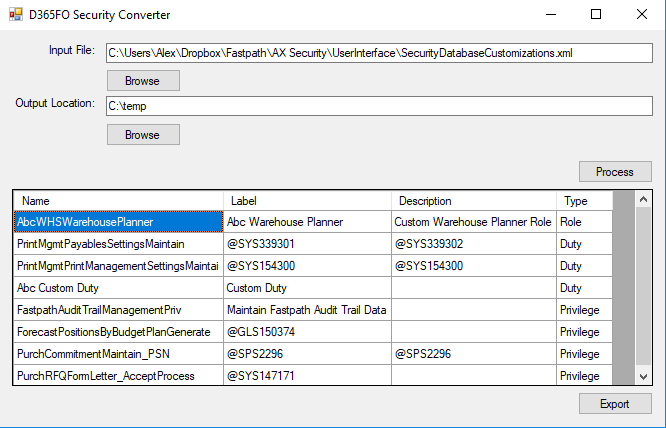
One thing to note here is that the Name field will almost always have to change based on one of the following conditions:
- If you are modifying an out of the box role/duty/privilege:
- You will want to either rename using your company ‘customization prefix’.
- If you created a new custom role/duty/privilege:
- D365FO will create a random GUID for the system name of the security layer, as this isn’t very descriptive you will want to change this.
- If you are modifying a custom role/duty/privilege you created previously:
- You will want to be sure you change the name column to the same value as you did previously.
The reason you have to change the name is that if you take an AOT XML to an environment that already has an element of the same name you will get build errors when you try to compile the project.
What is a Customization Prefix?
A company should have a 2-4 letter prefix they attach to all custom objects they create in AX/D365FO, and that includes security layers. In the highlighted example above you can see I added ‘Abc’ to the front of WHSWarehousePlanner. This lets everyone in your organization know that this is a custom object that has either been created by or customized by your company.
3. Now – you can actually create this security in a D365FO project.
- If you have a process for making security changes already; go ahead and follow that procedure, otherwise, my suggestions for setting this up would be:
- Create a model just for security (this way you segregate security changes from any other code changes), prefix model with a decided company customization prefix.
- Create a security project, with Roles, Duties, and Privileges folders.
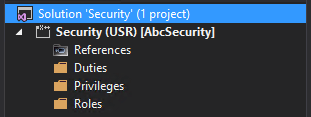
- Setting up your security project in this way allows you to easily and efficiently manage security, make modifications, and build deployable packages as needed without affecting other code customizations.
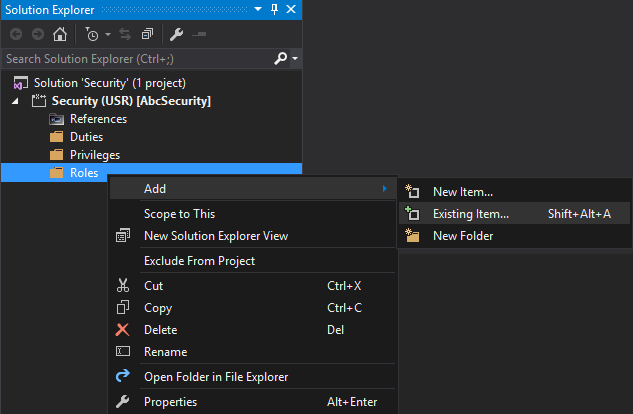
4. Copy the AOT XML files from the output of the D365FO Security Converter to the appropriate development folder in your D365FO security project.
- So for example, copy any roles from the AxSecurityRole folder in your output to the Roles folder in your D365FO Security project.
5. Go to the appropriate folder in your project for the security layer you are looking to add, right-click -> Add -> Existing Item… and find the XML file you just copied into your project directory.
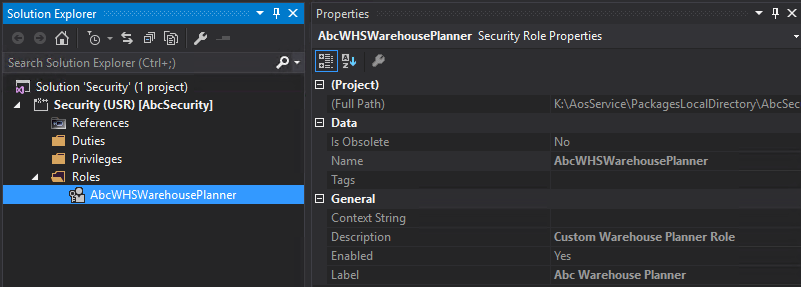
Once it is added you will see Visual Studio will immediately recognize it as a security element (in this case a security role) and list its properties. You can validate that the Name, Label, and Description are correctly brought over from the changes you made in the D365FO Security Converter tool.
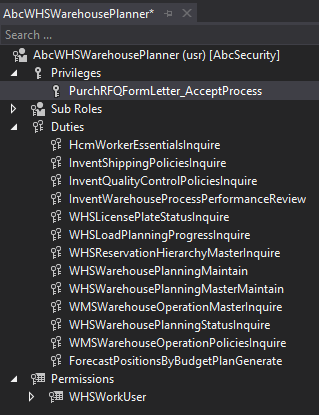
And if you open the security layer up, you can see all of the duty and privilege associations and object assignments are still there as well.
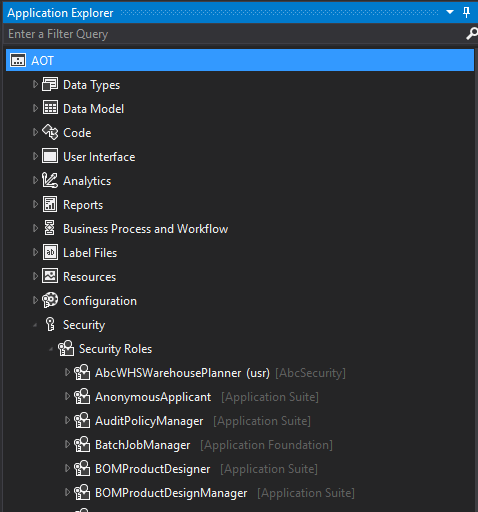
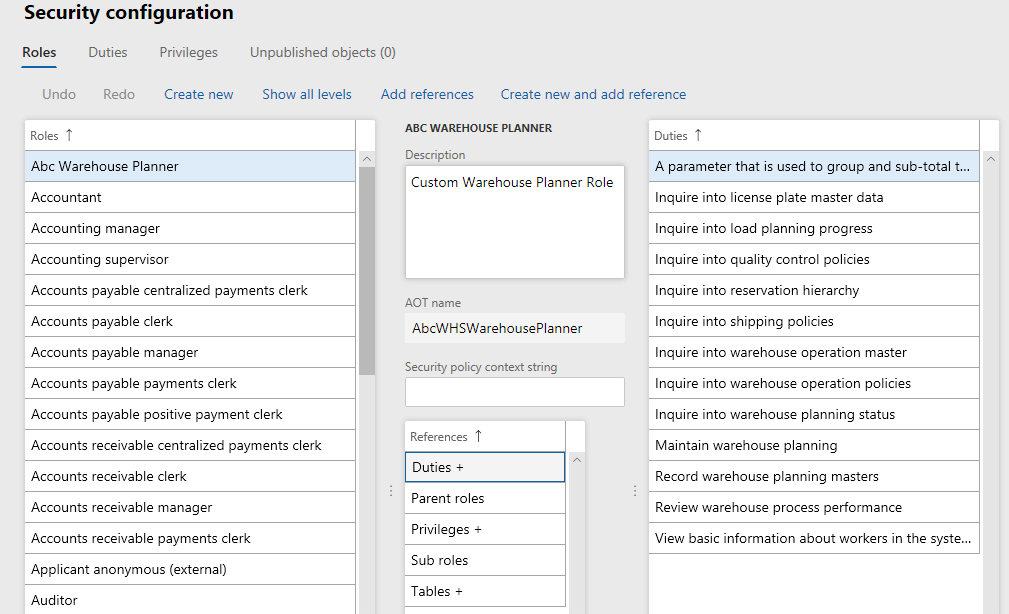
6. After a build and a database sync of the project, you can validate that the security layer has been added successfully by confirming it in the user interface and AOT.
- In the AOT:
- In the user interface:
7. Once the security has been moved to the AOT, it becomes part of your custom code and should follow your normal code promotion process from DEV -> PROD (and all the steps in between in your org).
8. Optional final step – if you are moving security from the user interface to AOT within the same environment you will probably want to remove all user interface customizations at this point as they all exist in code. This can be done from the System Administration -> Security Configuration -> Data tab -> Remove Customizations. If this step is not done, any further security changes done to the security layers you brought over in the AOT will not be reflected as the user interface version will still be overriding it.
Conclusion
In my view, managing security as code is much easier which is why I went about writing the D365FO Security Converter in the first place.
I hope this has helped show how it is possible to take changes made in the user interface and move them to your AOT. If you have any questions on the process please feel free to reach out!


